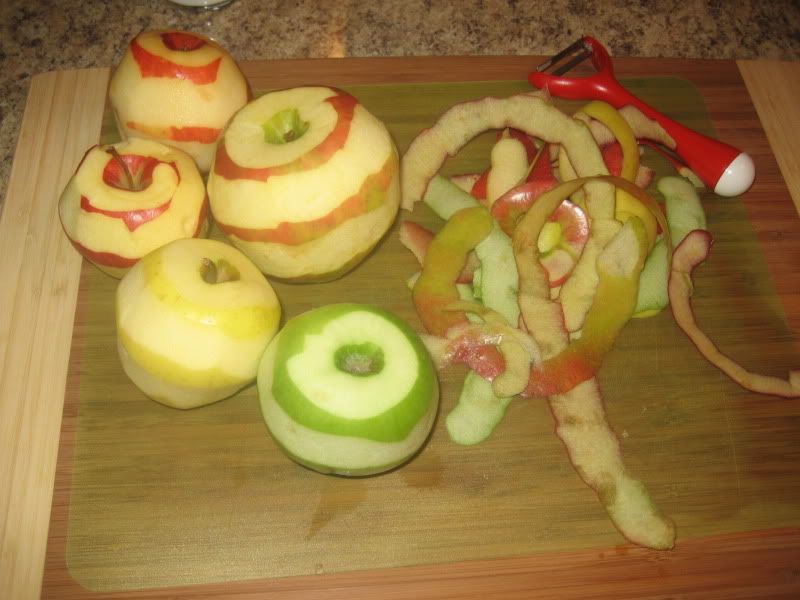
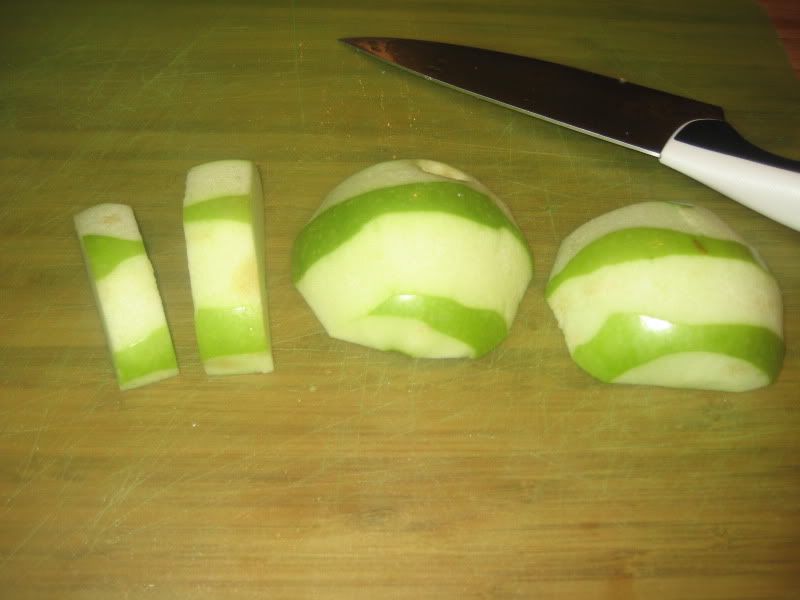
Which came from these 5 apples. Jazz and Galas are the two smaller reds in the back left. The red striped monster on the right is a Honeycrisp which is aptly named. I liked its texture and flavor the best of them all when I sampled them. The others are Golden Delicious and Granny Smith. (There's a glass color called "granny apple green" exactly that color. It's hard to work with and easy to overuse, but so much fun.) You'll notice I leave a little of the peel behind. It's because I like the color, not because I don't know how to peel.
The how and why of it all, along with an apple coring tutorial, if you
read more.
Several things came together to inspire this. One, it's fall and it's been feeling like fall. Baking is good in the fall. My mom called to talk about tidbits including the "secret" for award winning apple pies which is to use "one of each" apple when making the pie filling. Mixing it up mixes up the good and bad qualities. Also, she always doses hers with a bit of lemon juice to give it a little life. I also read in the Cook's Illustrated that pre-cooking apples on the stove, far from making baked apples mushy or mealy, actually prevents that fate. The trick is to heat them mildly to activate the pectin, then they can withstand baking better. And I went to Nick Malgieri's baking class at my local cooking school a couple saturdays ago which included a practically perfect bacon-spinach tart, and bought his cookbook "bake" which had a yummy looking apple dessert in it.
After seeing that it started with pre-cooking the apples on the stovetop, and not finding my Cooks recipe (which is behind a bunch of bathroom reno supplies), I decided to give it a go, using mom's new hint of the selection of apples. This was pretty fun with apples in season - I bought 2-3 each of 5 different kinds of apples, and still had more to choose from.
I'm lucky in that I'm good friends with someone who used to work on an apple farm, so I learned early in my baking days how to quickly "core" an apple. It requires 4 straight slices and leaves a square core. No twisting, turning, nor carving; no specialty tools. It goes a little something like this. Place your thumb and forefinger in the stem and flower ends of the apple. Move your hand directly over the apple and line up your knife with the edges of your knuckles. Slice down from there.
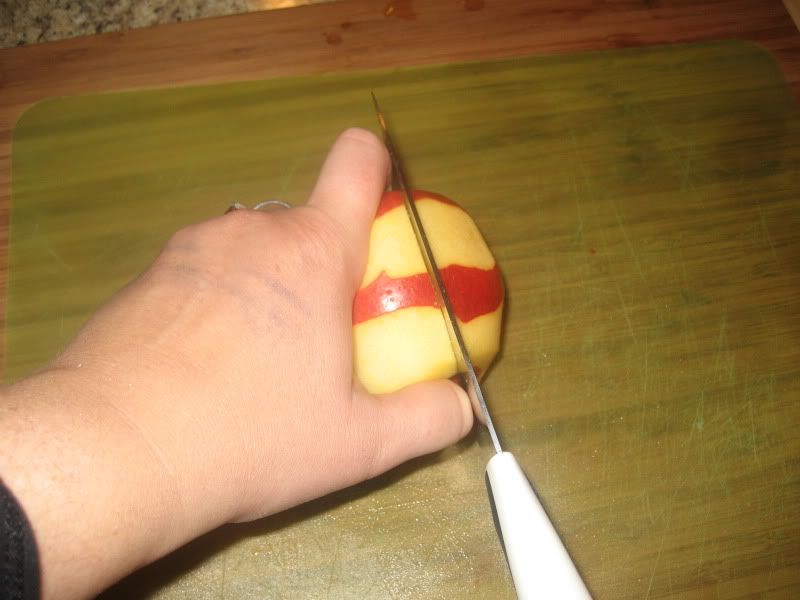
Repeat on the other sides. When the second cut is made with the first cut side flat to the cutting board, which is nice and stable, the result is asymmetric and great for chunking or slicing.

Requiring one more balancing act, it's possible to get a more symmetric set of pieces, which can be useful depending on the slicing needs of a recipe.
There you have it, quick and easy cored apples. You might think it's a little wasteful, but not really especially once you add in all the time saved for a little smidge of core. If I leave too much on the core, I cut off a couple corners to use for my sample bites. I also used to give those corner pieces to my hamster.
This technique is also great for other foods. Mangoes can be easily sliced by lining it up the long way under your finger and slicing down either side of the seed. Doing this on avocados portions it almost perfectly into thirds (slicing around the seed a bit on either side) and makes seed removal trivial. No more whacking a knife at the seed - and my palm - I just use either side then peel the center band off last. They actually last in the fridge for a few days this way. Moving on...
The filling calls for 2T of butter in a large skillet for 3# of apples. I had 2# 8oz and called that just fine. I have a large wok so I used that. It worked great. This is them on med heat being stirred together with the butter, 1/3 c sugar, and bit of cinnamon.
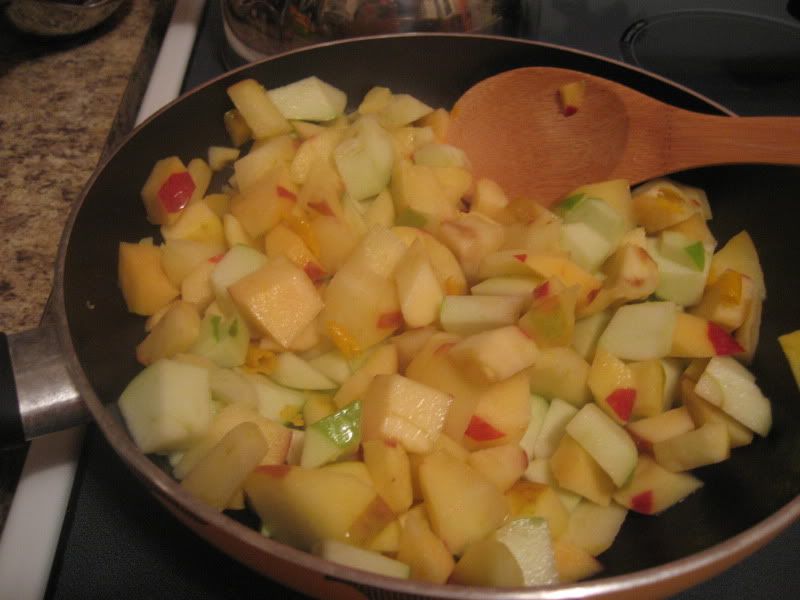
Inevitably I went off-recipe and added lemon juice and zest from one lemon, a bit of nutmeg, and a dash of salt. After that, per the instructions, I put a lid on and cooked them on low for 5 minutes to sweat them. With the juices out, one is supposed to add a half cup of currants. I couldn't find currants at either TJs or Ralphs or Vons, so I tossed in raisins, craisins, and dried blueberries because why not? I also added pecans because I like baked nuts. That got stirred up and cooked, still on low, until there was very little juice left.
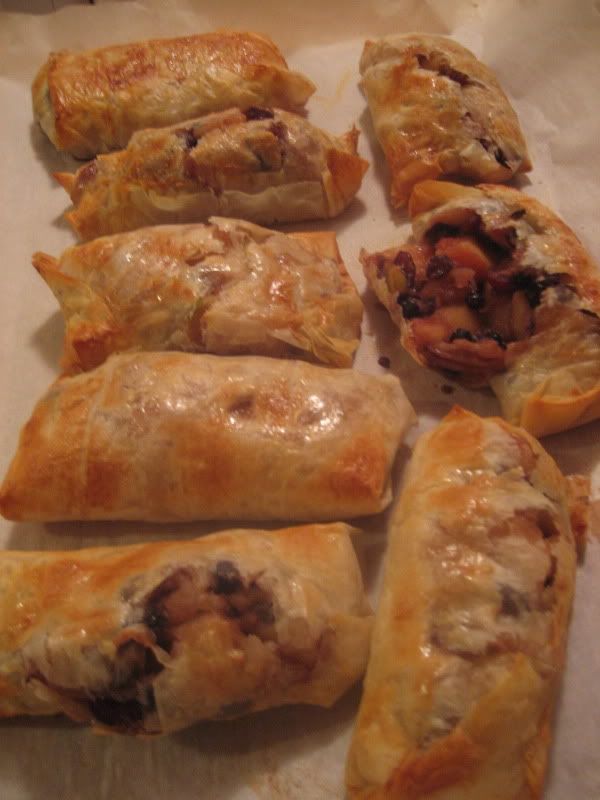
The next step was to make 2 logs by rolling the filling in a danish pastry. Well, I didn't feel like making a danish pastry which, incidentally, called for a stick and a half of butter. I had some filo dough languishing in the freezer, so I moved it to the fridge this morning and it was perfect by the time I finished texturizing the bathroom wall and airing the place out. I thought about the log idea, but decided to see if I could make self contained individual serving sizes instead. Using 4 layers of filo for each, I sliced the large rectangle in half and tried various wrapping schemes with the idea of getting 8-12 layers on the bottom side and sealing the edges.
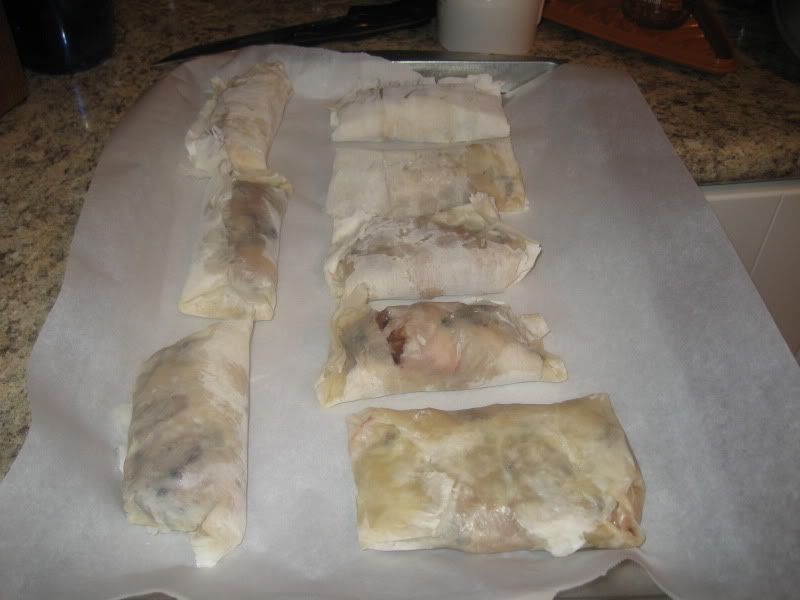
The one with the gaping hole only had 3 layers, which wasn't enough. Ironically, to brush *each* *freaking* *sheet* of filo dough, which took more time than making the dratted danish dough in the first place, I wound up using at least a stick of butter. The big win was a 15-17 minute bake time at 400F instead of an hour or more for thicker dough. I pierced the tops a bit (the log was to get decoratively sliced). Brushing the tops with egg white and dusting with sugar helped the browning, and using my small oven with the closeup burner placement got the bottom brown too.
The holey pie burst open in the last minute of cooking, making it an excellent sample with turtle ice cream.

I'm not quite sure how to store the remainder, but maybe freezing them? They're perfect right now, but even I can't eat a full dozen of them in one sitting.


No comments:
Post a Comment